https://avtanski.net/projects/backdrop is a simple tool that lets you pick custom colors and gradients and use your computer monitor as a digital photography backdrop.
https://avtanski.net/projects/backdrop is a simple tool that lets you pick custom colors and gradients and use your computer monitor as a digital photography backdrop.
Today my DIY seismic sensor captured a pair of strong earthquakes off the coast of New Zealand, over 9400 km away. One of the things I like about long-distance earthquakes is the clean surface waves that the sensor records.
Here are the surface waves from a mag 7.4 foreshock:
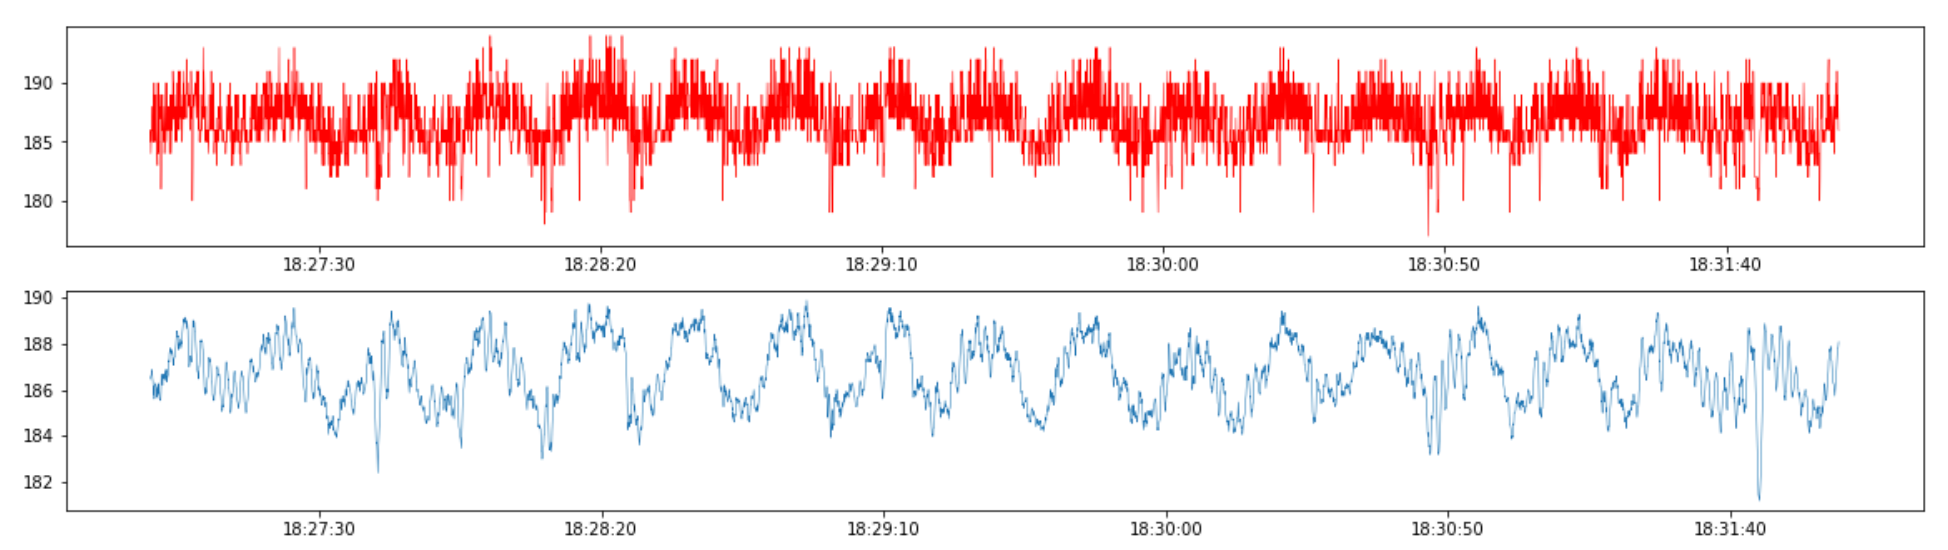
A few hours later, there was a massive magnitude 8.1 earthquake in the same area. The surface waves from this one look even prettier:
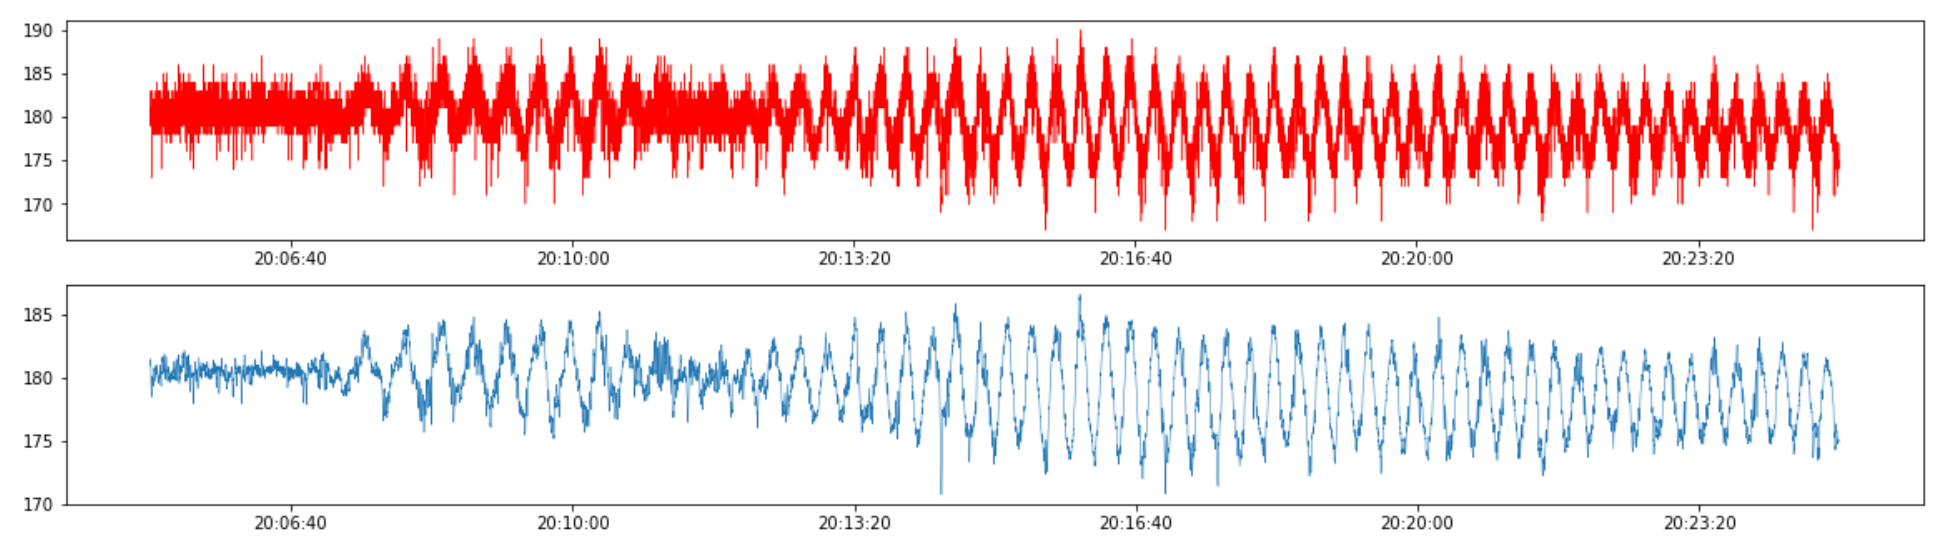
Note the two wave trains – a shorter Love wave train (about 20:07 to 20:11) followed by the Rayleigh wave with longer duration (starting around 20:12).
Note also the different wave frequencies – the Love wave’s main harmonic is at roughly 0.04 Hz (a period of roughly 24 sec) while the Rayleigh wave is at about 0.06 Hz (~ 16s period).
Check the project site for more details.
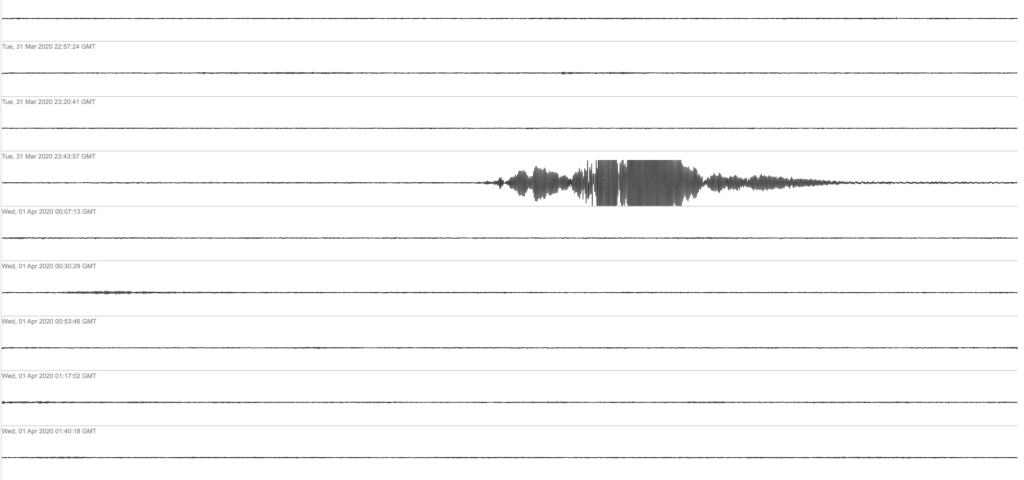
A nice recording from my DIY seismic sensor of the magnitude 6.5 Idaho earthquake on March 31st 2020.
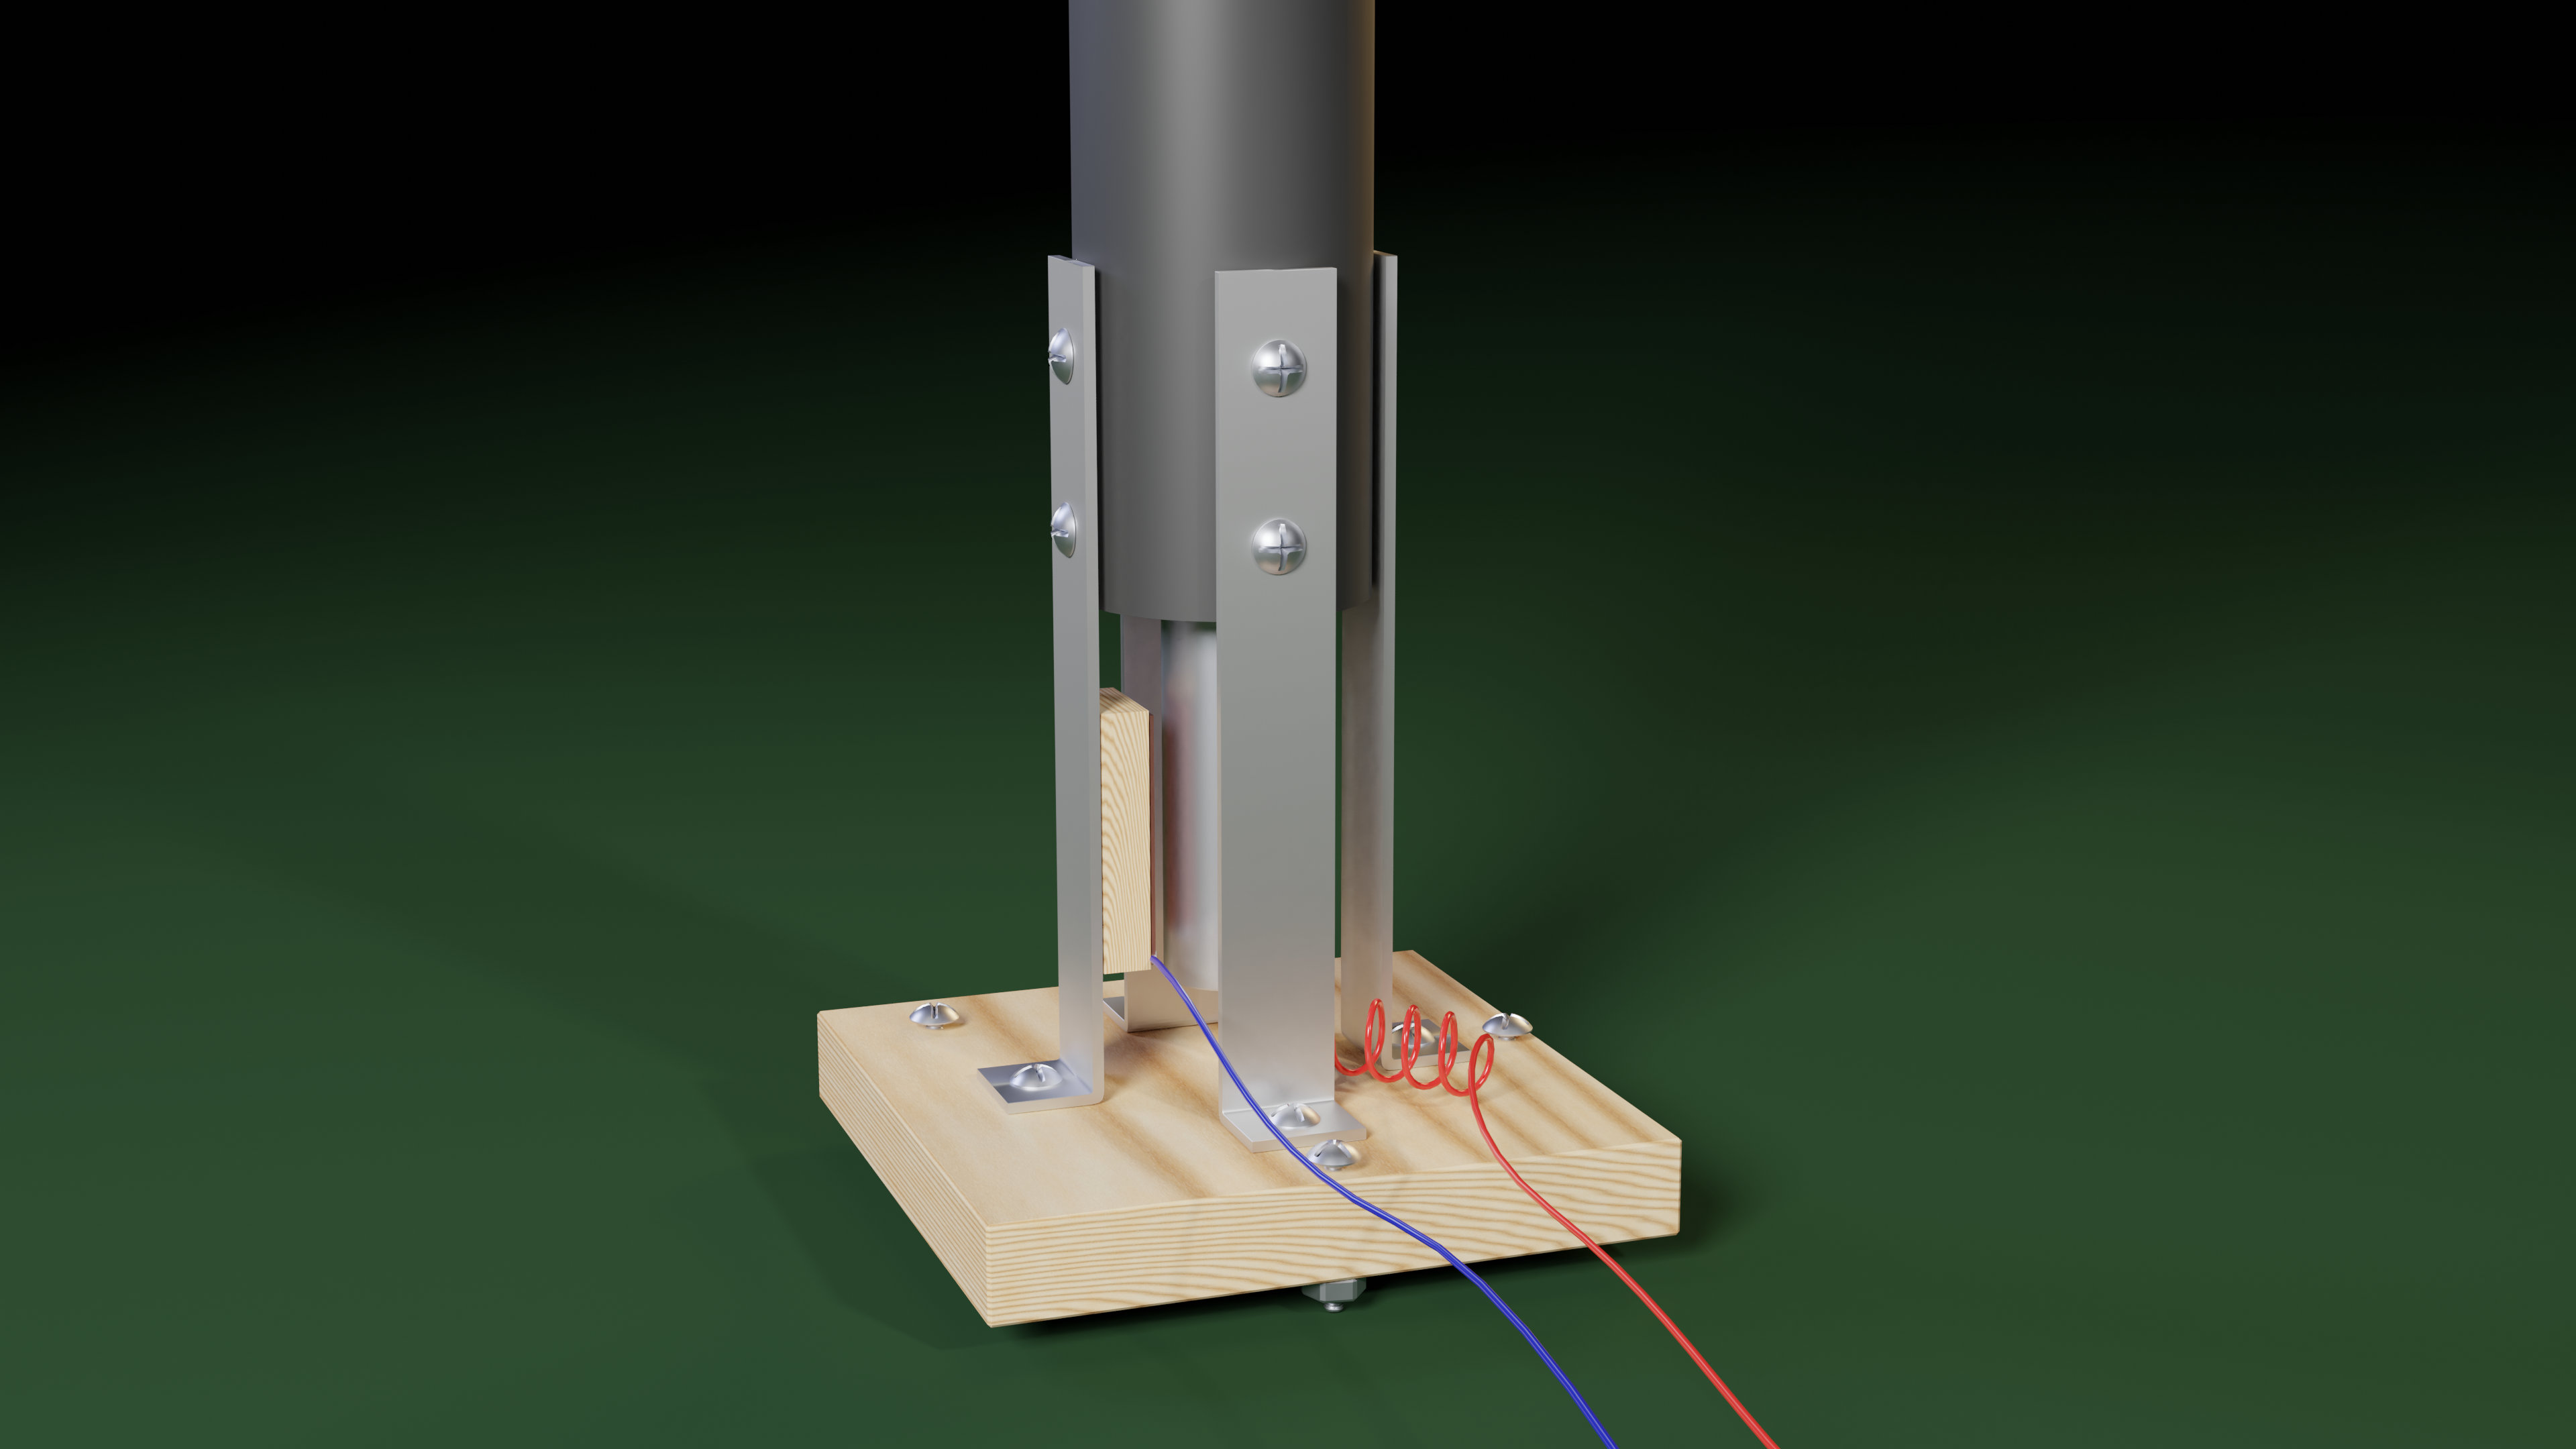
A simple and easy to build seismic sensor project, based on a PIC 16F690 microcontroller and a Raspberry Pi. The sensor streams data to the web and can be configured to send push notifications when ground shaking is detected.
See project page for details.
The LCD/LED Display Screenshot Generator has been updated – new simpler interface, support for character matrix displays, 7-segment, 14-segment, and 16-segment displays, custom color schemes, custom display geometries.
It may come handy for electronics projects/devices documentation, websites, etc.


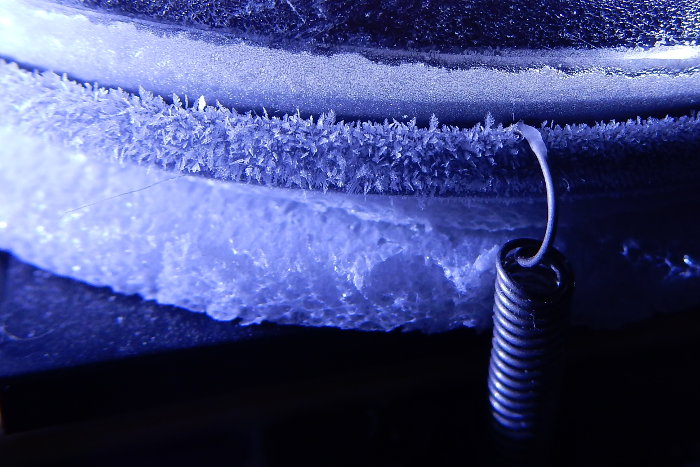
Minus 23.6° C!
I finally got to putting up a page for my Peltier-cooled cloud chamber. You can see it in action here (YouTube video).
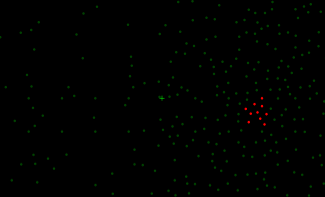
A cloud chamber is a basic ionizing radiation particle detector. It’s a container with supersaturated vapor. A charged particle passing through will produce ions that act as condensation nuclei, forming a visible trail of droplets. This virtual cloud chamber (click to see) gives you a rough idea of you what you can expect to see in a cloud chamber.
A blind-spot map
A tool for mapping the blind spot in one’s visual field. Works best on a desktop/laptop, not suited for mobile devices.
A big surprise this morning – checking my magnetometer‘s logs I found that it had recorded the strongest magnetic storm since it was built in December 2011:
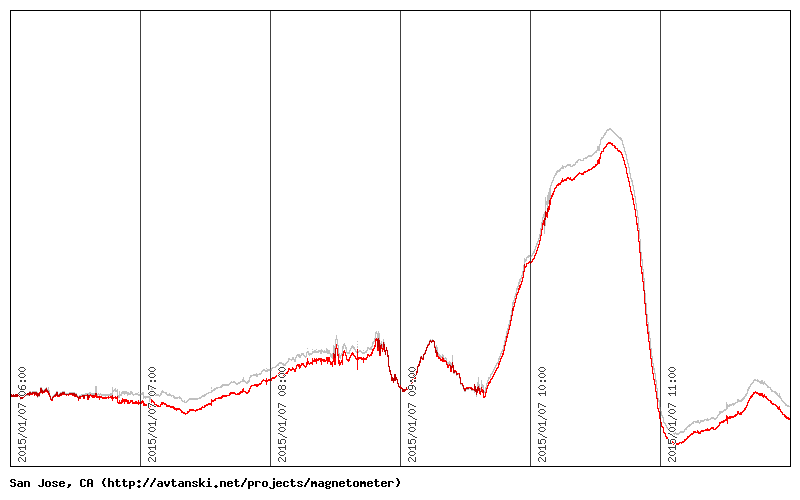
The weird thing is that the storm was completely unexpected! It’s like hearing a sunny weather forecast and getting the biggest snowstorm in years instead.
The explanation? Spaceweather.com says:
UNEXPECTED GEOMAGNETIC STORM: A strong G3-class geomagnetic storm erupted during the early hours of Jan. 7th, sparking bright auroras around Earth’s poles. What happened? The interplanetary magnetic field (IMF) near our planet tipped south, opening a crack in Earth’s magnetosphere. Solar wind poured in to fuel the strongest magnetic storm since Sept. 2014. NOAA analysts believe the fluctuation in IMF is related to the arrival of a CME originally expected to miss Earth.
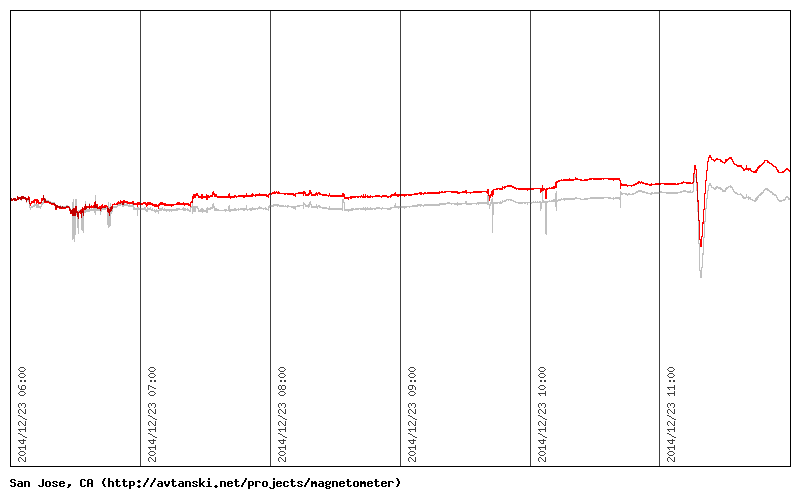
The magnetometer registered a CME impact on Dec 23, 2014, around 11:18 UTC. This is probably the sharpest CME hit I’ve recorded so far:
Checking my magnetometer today I found this beautiful record. Last night the Earth entered a fast moving (~700 km/s according to ACE) stream of solar wind. The wind’s buffeting of the magnetosphere is visible as a sudden increase of the noise around 14:40 UTC.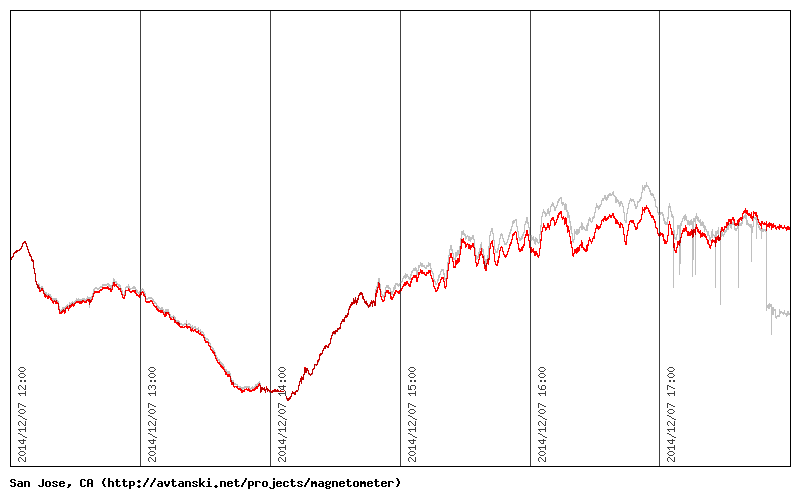
© 2026 DIY Science and Electronics Projects · Proudly powered by WordPress & Green Park 2 by Cordobo.
Valid XHTML 1.0 Transitional | Valid CSS 3
![]()